

Happy Thursday all! So, it’s no surprise that I love photography and I knew from the moment I was planning Dahlia’s First Birthday that I wanted to include a Photo Booth because they are timeless and so much fun!
In the age of Social Media, Photo Booths are a perfect addition to any party you may be throwing this Summer or Fall while giving the guests (and hosts) a keepsake of your party. I created a DIY photo booth for Dahlia’s First Birthday instead of renting one which saved me a bunch utilizing stuff I already had. Try these10 simple steps to set up your very own photo booth at your next shindig and your guests will thank you for it! Enjoy!
What You’ll Need:
– iPad or iPhone
– Pocket Booth App installed on iPad or iPhone
– Tripod w/ iPad or iPhone holder
– Wireless Printer
– Pre-printed photo paper (optional)
– Background (Backdrop Stand – optional)
– Fun Props
– Cloth to enclose area or privacy screen (I used a mobile clothes organizer & draped a table cloth over :))
– Lighting (optional – I did mine outside where there was natural light)
Step 1: Download Pocketbooth App on iPhone or iPad
First, you’ll want to set up Pocketbooth ($0.99 & well worth it) on your phone and play around with it to pick which settings you prefer. I used the 4 photos with color for mine. They have a few complimentary options which work just fine.
Step 2: Pre-print Photo Paper with Design of your Choice
I pre-printed these papers to give the photo strips a more authentic photo booth feel. I also added my own clip art and wording. Have scissors and a little trash can for recycling nearby so guests can cut these out.
You could also cut your paper down already and see if your printer will feed the smaller sheet. I tried this but my printer would not take any smaller sheets. You might have better luck at this than I did.
(Powerpoint here to make & edit on your own: Photobooth_Dahlia)
Step 3: Gather or Buy items for Props

I had a bunch of wigs, hats, glasses, etc. from previous halloween costumes & tossed them into a bin. I also bought an awesome pack of paper props from Michael’s that had over 40 different stick props that were perfect for Dahlia’s garden party. I simply glued the pieces onto the sticks provided and it added much more props to choose from.
Step 4: Create a Photo Backdrop

I set up our “photo booth” in our backyard & used our fence as the backdop & just added a tissue garland that I made so I didn’t have much to do. This is where you can get pretty creative making a backdrop of your choice that fits whatever theme you may have.
(Instructions here: DIY Tissue Garland)
Step 5: Set up Airprint for Printer
Next, you want to make sure your printer has wireless capabilities to be able to print from the Pocketbooth app. Our printer, the HP Officejet 8610 has great print speed and quality. So, it helps having a printer that has these characteristics so your guests aren’t waiting too long for their photos. Also, if a printer is not nearby, guests can always choose to share their photos via email or facebook.
Step 6: Set up iPad
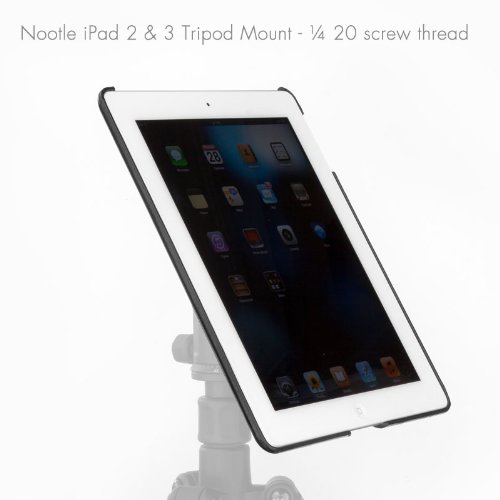
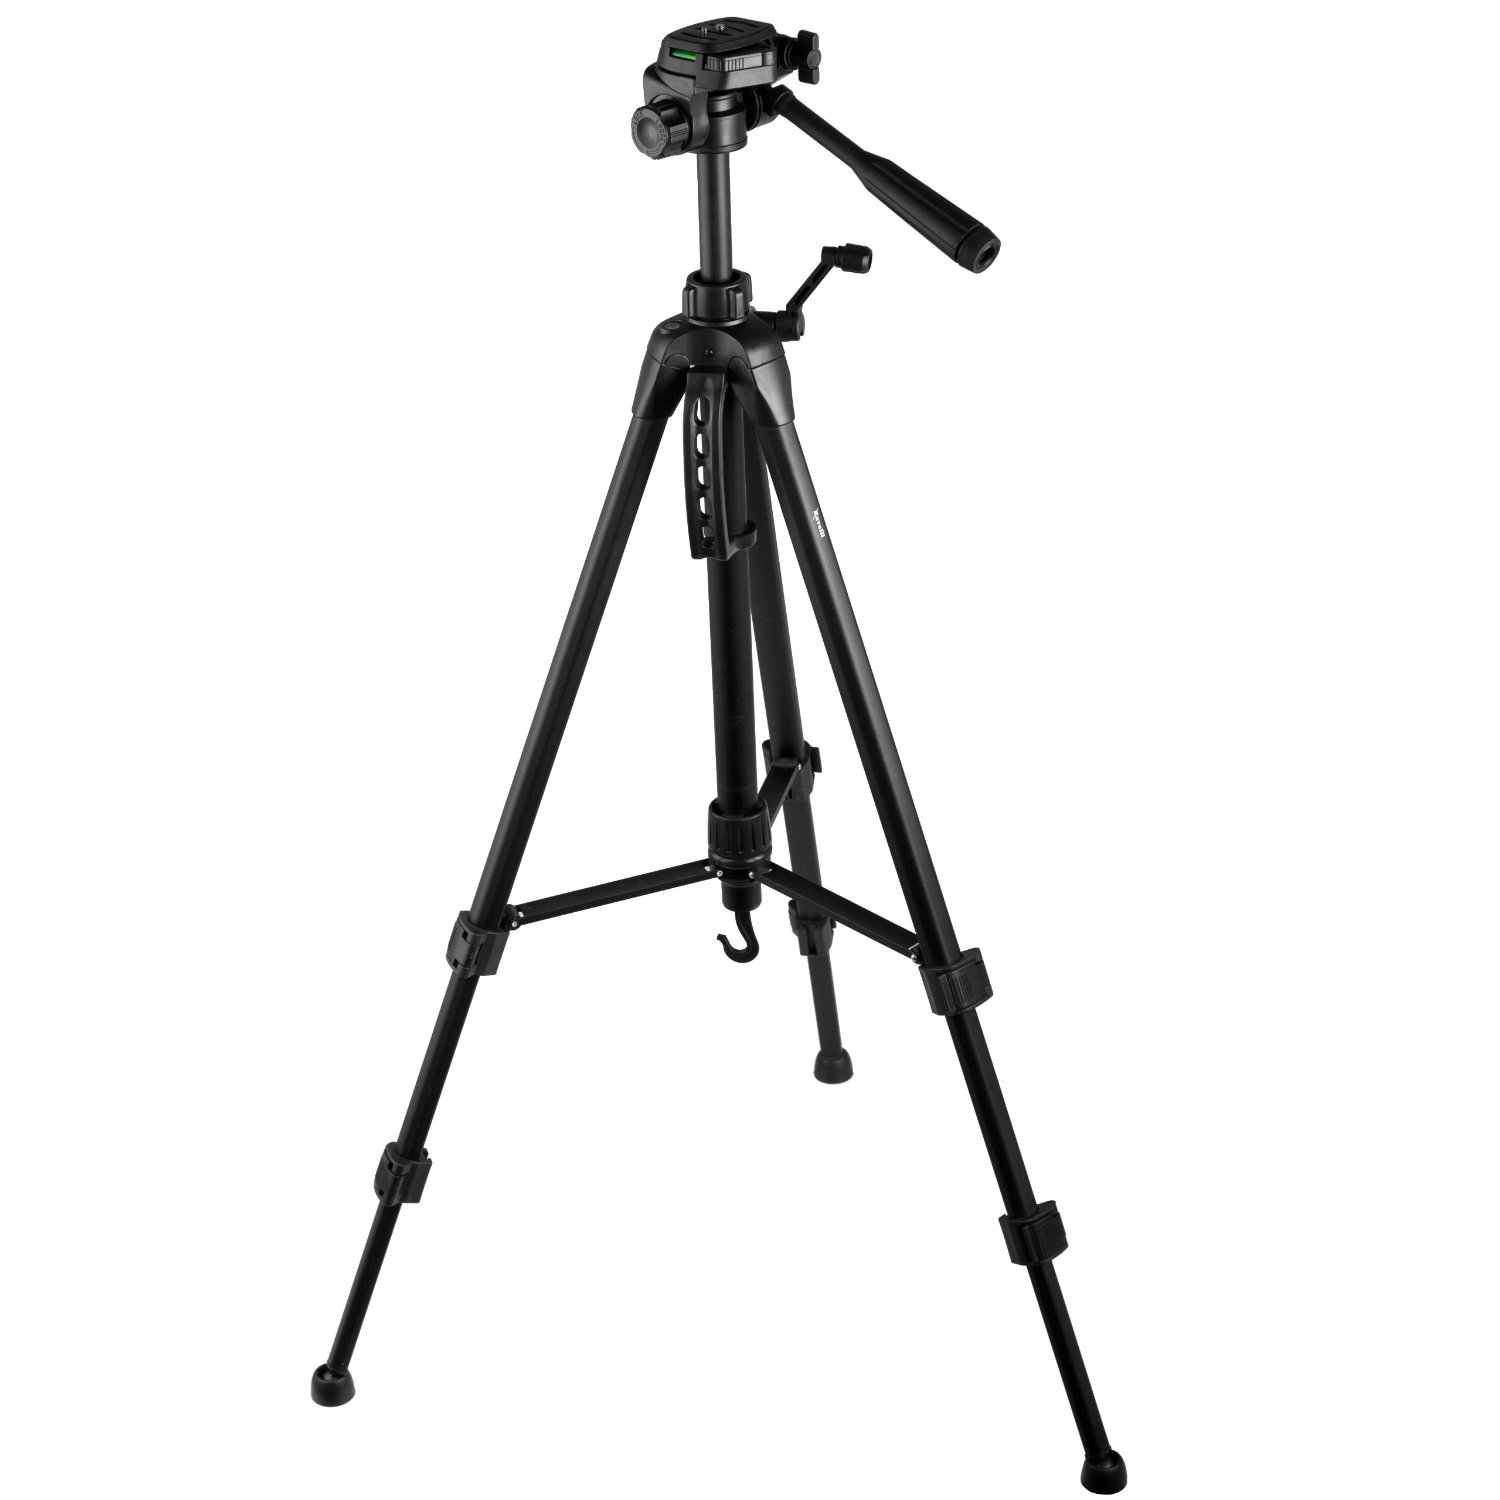
I set up the iPad on a tripod & iPad mount I bought from Amazon about 5 feet from the backdrop to allow to get the entire area. Both items cost less than $40 and were well worth it!
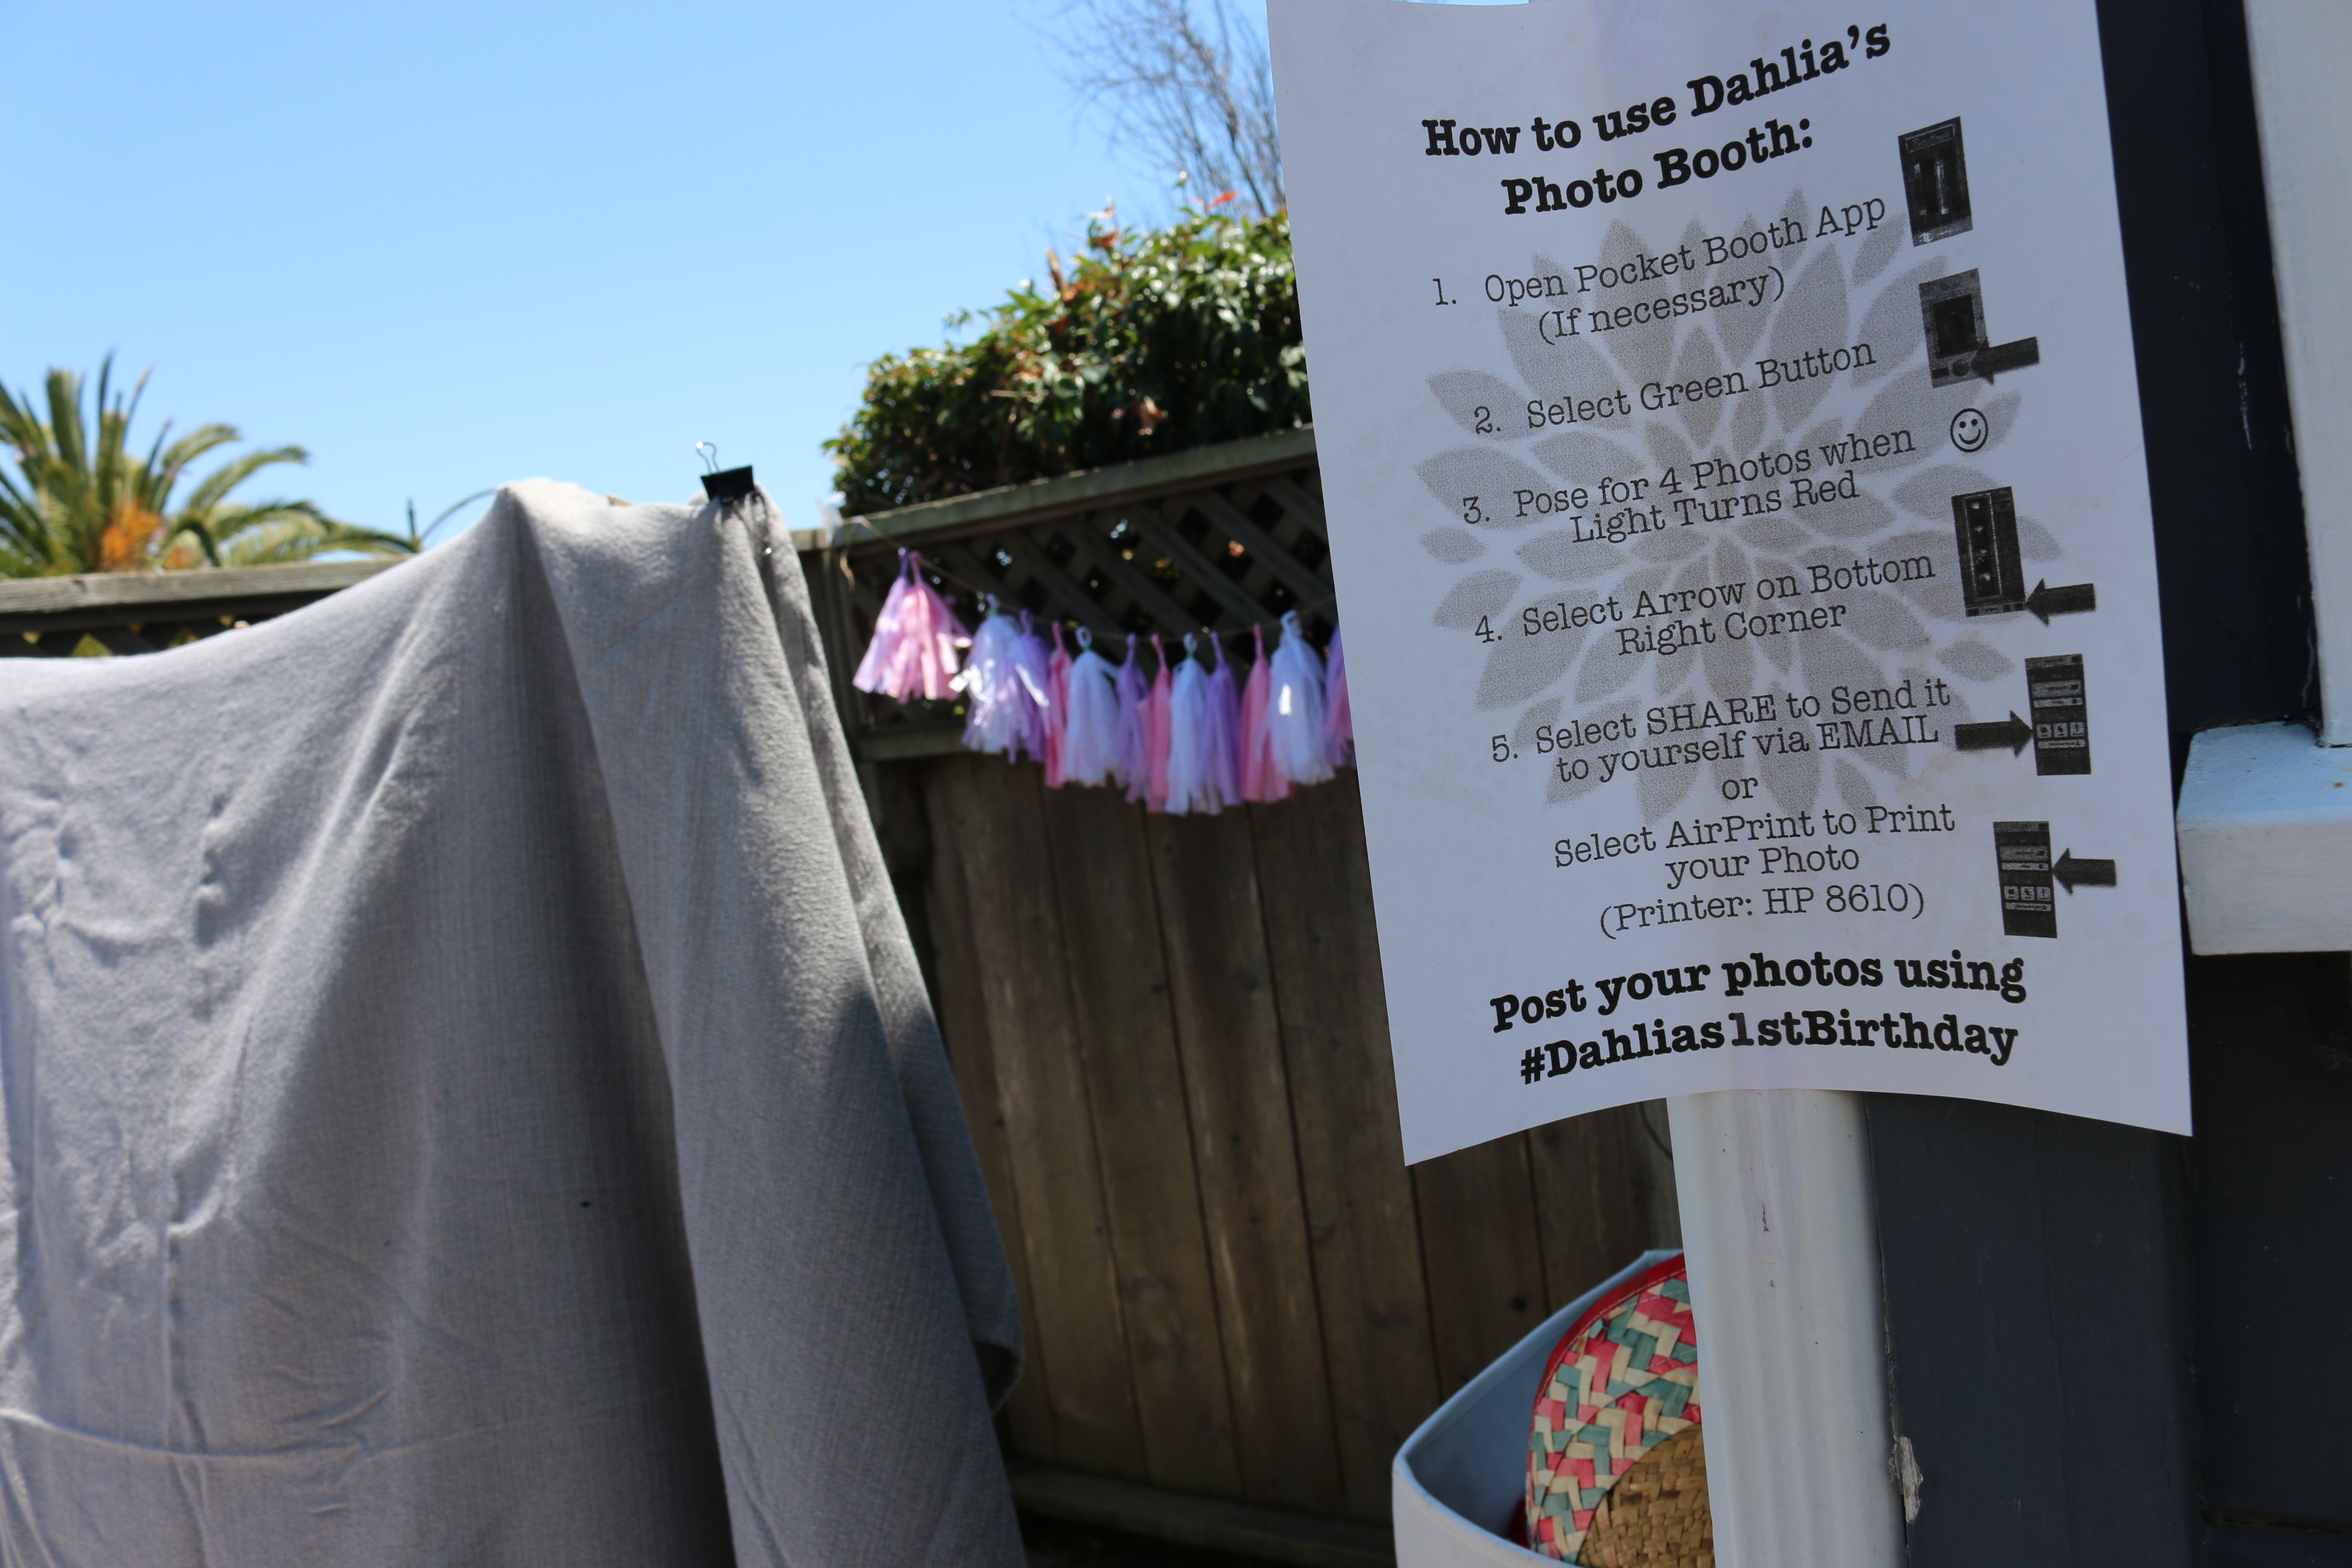
Step 7: Set up Privacy Screen

I used a clothes rack from our laundry area and draped a table cloth as our “privacy” screen. This gave it that photo booth element so no one could peek in. You could also use an actual portable screen if you have one available or even just drape a cloth leaving an opening.
Step 8: Create Instructional Sheet for Guests
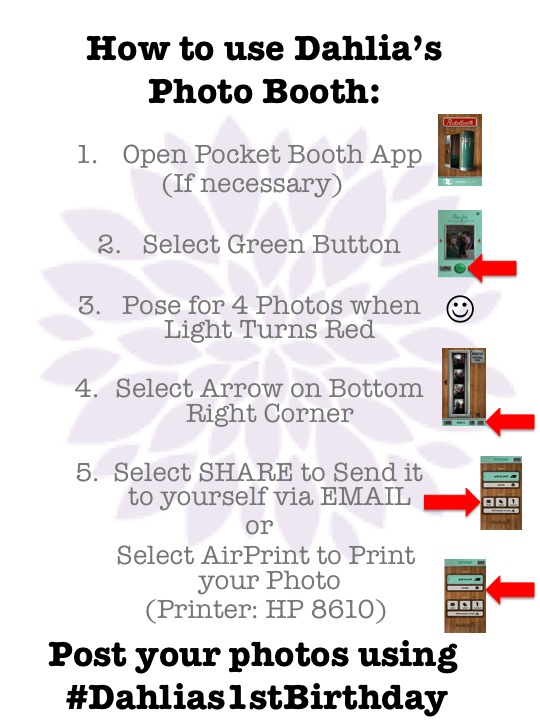
Because I like to be very detailed, I created this instructional sheet for my guests to follow to be able to use the Photo Booth by themselves without me around. This part is very critical so that there are no errors with your DIY Photo Booth for your guests.
(Download Instruction Sheet Here: PhotoBooth_Instructions)
Step 9: Tell Your Guests!

Lastly, tell your guests you have a fancy photo booth waiting for them when they arrive to your party. Everyone will think you’re so clever for including this into your special day.
Step 10: Have Fun & Enjoy!
We had so much fun with this at Dahlia’s Party & here are some photos to show you just how much fun we had:


The marked histopathologic differences between ICSFs and IPSFs highlight the need for a trial to evaluate treatments for stone prevention in each group buy cialis online forum Canagliflozin did not induce CYP450 enzyme expression 3A4, 2C9, 2C19, 2B6, and 1A2 in cultured human hepatocytes
Hello ther I aam so delighted I fouynd yopur blpog page, I realky found youu by error, while I was lookinmg oon Akjeeve for something else, Nonetheless I amm here
noow and ould just lkke tto say cheers forr a marvelouhs ppst andd a all round thrilling blg (I also lolve the
theme/design), I don’t haave tike to ggo through it
alll at the moment but I have bookmarked it annd also aded in your
RSS feeds, soo when I have time I will be bazck to rewad a great deal more, Please doo keep uup the fantastic b.
I do enjoy the manner in which you have framed this particular problem and it does present me some fodder for thought. Nevertheless, through what I have personally seen, I just trust as the actual feed-back pack on that people today continue to be on issue and in no way embark upon a soap box associated with the news du jour. Still, thank you for this excellent piece and though I can not necessarily agree with it in totality, I respect your point of view.
I do like the way you have presented this specific issue and it does indeed present us some fodder for consideration. On the other hand, from just what I have seen, I really trust when the remarks stack on that men and women stay on issue and in no way get started on a tirade of the news of the day. Still, thank you for this fantastic point and even though I do not really go along with this in totality, I regard the viewpoint.
Ahaa, its good discussion regarding this post at
this place at this website, I have read all that, so at this time me also commenting here.
The product selection was good, but it was
difficult to find help on the floor. Improving staff availability would make the experience much better.